How to Make Beautiful and Snuggly Crocheted Ruffled Scarves · Craftwhack
More and more people are getting cracking on crocheting as a hobby and a means of creating amazing, cute clothing that you can style to your verbal tastes. It's a good manner to exist more eco-friendly, specially if y'all employ natural yarns and avert acrylics. Y'all can cut all the issues of fast way and make your ain beautiful garments!
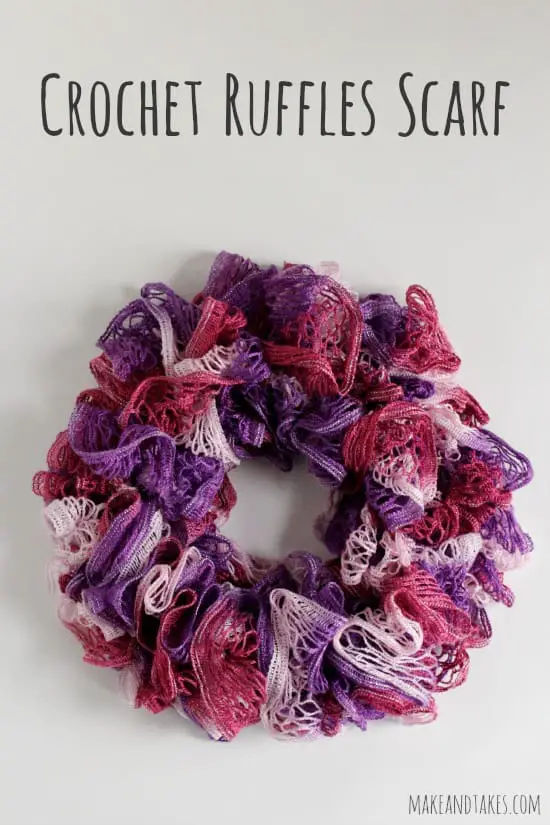
Crocheted ruffled scarves are cute and practical, reasonably snuggly in wintertime, and highly stylish. Wow! All your friends with these incredible things! They are the peak of fashion and many celebrities are adopting their unique look, then go ahead of the trend by making your own.
At that place are a couple of different methods for making ruffled scarves, so we're going to embrace 2 different options y'all might want to attempt. Both are very piece of cake and you should take no problem achieving a beautiful and constructive accessory without much fourth dimension investment.
In example you need to double-check whatever of the standard abbreviations for crochet, here they are:
For the convenience of whatsoever beginners, this guide will non utilise abbreviations, but the full terms throughout.
Source: https://www.makeandtakes.com/crochet-ruffles-scarf-pattern
Materials
For your crochet ruffled scarf with ruffle yarn, you'll require:
- A seven mm crochet hook
- ane-2 skeins of ruffle yarn in the colour of your choice
- Pair of scissors
- A yarn needle (for weaving the ends in)
- Colored sew together markers
What Is Ruffle Yarn?
Ruffle yarn or mesh yarn is perfect for a ruffled scarf. Yous tin can buy it from many different brands, and it'due south growing in popularity right at present because it creates such an extraordinarily striking look. It can be a fleck fiddly to become the hang of, but one time yous know what you're doing, it'due south piece of cake to employ.
There are another very creative uses for this fun yarn, just ruffled scarves are so far the about popular and straightforward mode to use them.
A few people talk nigh having tried to utilise ruffled yarn and given up in frustration because it can be a footling confusing which side you're supposed to apply and how. Hopefully, this guide will help clear upward any issues and give you the confidence to have another go.
Row i: Stretch Out Some Of Your Yarn
Stretch out your yarn for a couple of feet, spreading the ruffles then you can easily distinguish the thicker edge. The other edge will have slightly smaller holes and not quite such a thick edge. Work out which is which earlier you get started.
Plough the thicker edge and so that it's the right style upward for you to work with it, and polish the yarn out flat so you tin't accidentally get tangled up and start working on the wrong side of the yarn.
Fold the offset few inches of your yarn over and line it upwardly then that the holes friction match. This will hide the end, giving yous a overnice, tidy stop. Virtually iii-5 inches should be enough to forestall the cease from sticking out.
Step 2: Get The Hook In Place
Detect the first pigsty on your folded edge and slip the claw into it. From there, begin weaving the hook into each hole, as though you were knitting rather than crocheting. Gather the loops of mesh over the stalk of the crochet claw, and don't let them slip off the other side.
You can later play around and experiment with a different weaving pattern, but for this scarf, permit's keep it simple; merely weave through every hole, going in and out so that the yarn bunches up over the crochet hook.
Step iii: Hook Information technology Through
One time you take reached the tenth hole, cease weaving. Turn your claw over in your easily and snag the loop you take just gone through on the stop of the hook. Pull that loop back through the other nine loops you have just gone through.
Practise this slowly so yous don't end up accidentally hooking any of the other loops. If one gets snagged, pause and gently untangle information technology.
This motion will gather all the loops y'all've threaded onto the hook into a ruffle and you've got the showtime step of the scarf already! What could be easier?
Add a sew marker at this betoken so you'll know that'southward 1 "set" of ruffles in place. This should brand things easier if you terminate up having to undo some because yous won't have to get all the fashion to the start to keep count.
Footstep 4: Make A Second Ruffle
Loop your hook through the next hole and repeat the process, weaving through 10 holes and hooking the concluding loop dorsum through the other nine. Again, exist careful not to get caught in any of the other holes.
This is the second ruffle done. Once again, marker it with a stitch marking, and motion on to the third.
Step 5: Go on Making Ruffles
Keep working through the yarn and making ruffles until you're pleased with the length of the scarf. You can make it every bit long or as short as you desire – until you lot run out of yarn, of grade. Make certain you lot are happy with the length earlier finishing.
Step half dozen: Cut The Finish
One time you've got a long plenty scarf, cut the yarn after the last ruffle. Make sure yous snip all the threads in a straight line as this volition give you lot a neater finish.
Once you have done, tie a knot in the yarn, finishing all the loose ends off. This will not exist very visible amongst all the ruffles of the scarf, and so don't worry about hiding information technology.
Stride 7: Sew Into A Circle (Optional)
If you want to make your ruffle scarf into an infinity scarf, grab your yarn needle and yarn of a similar color (so that it will alloy in). You can also use a normal sewing needle and sewing cotton for this if you adopt.
Tie your yarn around i strand of mesh, and and so brainstorm weaving the two ends of your ruffled scarf tightly together. The ruffles should hide near of this joint even if it is non very neat, only endeavor and keep it tidy. When yous're satisfied that the bond is secure, knot your yarn and cut away the excess.
You should only practise this with quite a long ruffled scarf, or yous may find information technology doesn't fit very well, and you lot tin't twist it around. However, this is groovy if you lot detect the abaft ends of your scarf get in your way. It'll likewise mean yous can be sure you'll never take it accidentally slip off your neck!
You've now finished an amazing ruffled scarf with very stylish mesh yarn. Mix and friction match dissimilar colors and experiment with unlike numbers of loops existence pulled through to create a whole range of different styles and looks. Pulling more than loops through will use more than yarn, but result in more "puff" for the scarf.
You can even alternate, perhaps pulling five loops through on the first ruffle, ten through on the next, five on the ane afterward that, x on the 1 after, etc. This will create a very interesting effect and give your scarf even more than "oomph" and texture. Play around and have fun until you find the expect you like best.
Ruffled Scarf With Normal Yarn

Source: https://world wide web.youtube.com/watch?v=K_nrcrzfxLA
Materials
For your crochet ruffled scarf with normal yarn, y'all'll crave:
- A 7 mm crochet hook
- 1-two skeins of yarn in the color of your choice (multicolored looks great for these scarves)
- Scissors
- A yarn needle (for weaving the ends in)
- Colored stitch markers
Footstep one: Chain 200 Stitches
Create a sideslip knot in your yarn and chain 200 stitches on it. Yous can practice fewer stitches if you want a specially brusk scarf, or more for a longer scarf, but for most people, 200 is a practiced length.
Y'all may desire to utilise your stitch markers to mark the 50, 100, and 150th stitches to brand counting easier (or even smaller increments).
Pace 2: Beginning Row I
Begin past counting back ii stitches then double-crocheting them into the third chain on your scarf. Double crochet all the style forth your chain, going into each one.
Information technology helps to count your stitches to make sure y'all have the right number from the starting time. It's very frustrating to suddenly realize you are short a few stitches afterward in the process. The stitch markers help reduce this possibility, then count your way to each as you get along.
Step 3: Start Row Two
When you reach the terminate of your chain, concatenation four more stitches. Next, gently sideslip your finger into the space that your terminal double crochet (on the row you have but completed) formed and make a double crochet in that.
Chain two more stitches, and and so create another double crochet in the same space y'all just created the first double crochet in. Recall, you are creating a ruffle scarf, and so you want your yarn to agglomeration up on summit of itself – this might experience incorrect, merely information technology isn't.
Repeat this step 1 more than time, and then y'all have third double crochet in that same double crochet from the previous row.
Step iv: Keep Row 2
At present, you are going to carry on double crocheting into your first row. Chain 2 stitches. Identify this same space, ane along, where the double crochet in Row I forms a gap. Double crochet into it.
Concatenation ii. Move along to the next double crochet, and double crochet into its space. Proceed going forth in this fashion, remembering to chain 2 between each of your double crochets. This is of import.
When you reach the last double crochet, crochet three double crochets with two chains between each into information technology. You should now have iii double crochets at either end of your scarf, and a single double crochet in each stitch gap along.
Footstep 5: Start Row Three
When you have put the iii double crochets into the final double crochet of the row, chain two, and then begin moving back down the row to create row 3, chaining 2 and double crocheting into each infinite equally you go.
You should be able to encounter a slap-up curly effect forming in your scarf as it begins to wind around itself and the yarn starts to pull in.
When you reach the end of Row Three, chain two more than stitches and then connect to the top of the last double crochet with a slip knot.
Stride 6: Ruffling The Ends
Brand a unmarried crochet into the concluding double crochet, which will bring your yarn and hook dorsum to the center at the end of the scarf. From here, concatenation vi more stitches.
In the adjacent double crochet at the cease of the scarf, insert the claw and create a double crochet. This is going to start calculation a ruffle to the end of the scarf, besides as its body.
Chain 4 more than stitches, and double crochet into the adjacent space along.
Step 7: Go along The Double Crochets
Concatenation four, and double crochet into the next space again. You should continue this until y'all accept completed a full circle. Keep chaining four in betwixt each double crochet, or your scarf volition pull out of shape.
This volition add a cracking frilled edge to your twisty scarf, mimicking the expect of ruffled yarn beautifully. With a multicolored yarn, it will look particularly effective.
Pace 8: Finish The Circumvolve
When you lot reach the last double crochet, chain four, and then make a single crochet on the height of the double crochet that you started this circle with. It should be the very next run up.
At this point, you can choose to stop the scarf, in which case, skip to Step 10. If you lot'd like your scarf a little bigger and more ruffly, let's comport on! Bear in heed that the scarf can go a trivial loopy and impractical if you lot go besides far, and so don't get carried away.
Step 9: Create The Next Circle
If you practise want to continue your scarf, chain 5 and do some other circle of double crochets, working your way correct around the edge. Put five chains betwixt each double crochet, equally the larger surface surface area volition require more yarn and flexibility. You lot may need a second skein of yarn for this; brand sure y'all have enough.
Footstep 10: Finishing The Scarf
Once you achieve the end of your circle again, you will probably want to stop the scarf off. Theoretically, y'all could keep going, calculation to your chain each fourth dimension to make sure you lot have enough yarn, but this scarf will likely be large plenty now.
Close the final chain and then chain one. Pull excess yarn through your loop, cut it off, and pull it to create a knot.
Grab your yarn needle and weave in the stop; it should exist easy to hide information technology among all the ruffles.
You will not become such a full effect with ordinary yarn as you might with mesh yarn, only you will probably observe a greater range of colors, and it is more readily available. You lot may also prefer working with ordinary yarn, as ruffle yarn can be disruptive and difficult work.
Step 11: Sew Into A Circle (Optional)
We mentioned the benefits of sewing the scarf into a circle in the higher up instructions; it makes information technology easier to habiliment and harder to lose. If you want to practise this with your ruffle scarf, first check that it'south long enough; you don't want to find yous've made an awkward necklace instead of a scarf.
Pivot it in place to check this before stitching. If yous're happy with the length and look, grab some more of your multicolored yarn and thread your yarn needle.
Make up one's mind if you want to put any permanent twists in it to assistance with the ruffle, or if y'all like it every bit it is. Once you've made up your mind, use the yarn to ladder sew the two ends of the scarf together, weaving them to create a tight bail.
Knot the yarn and weave in whatsoever backlog thread, and you've got a swell infinity scarf that's besides a ruffle scarf!
Conclusion
Ruffle scarves brand an astonishing accessory to whatsoever outfit, especially if you cull hit colors. The mesh ones are very quick and easy to brand, while a ruffle scarf with normal yarn will accept a flake more fourth dimension and endeavor.
Yous tin mix up the colors in either scarf and have a whole option to pair with your various outfits. Similar many crochet projects, they look more complicated than they actually are, so don't exist put off by all the frills and fluff; they are super piece of cake and volition certainly impress everyone y'all know.
These besides make peachy handmade gifts, and because they are quick to create, yous tin churn out one each for all your close friends, making Christmas a little more than eco-friendly and a little more personal for everyone. Choose colors they'll love, and you've got an immediately thoughtful gift that shouldn't have long to make!
Source: https://craftwhack.com/how-to-make-crocheted-ruffled-scarves/
0 Response to "How to Make Beautiful and Snuggly Crocheted Ruffled Scarves · Craftwhack"
Post a Comment